ShopDreamUp AI ArtDreamUp
Deviation Actions

Welcome to Learning to Paint Digitally, Edition 2. I am amazed at the enthusiasm of the digital community with my first article, I really did not expect such a huge response, and honestly I am thrilled. I am so glad I was able to help so many people, so, lets get started on Edition 2 already!
The Plan: This series is not only to give beginners a starting point, but also to help even seasoned painters with tricks or tips they did not know before. My hope is that we all learn something we did not know before since there are so many ways to do one thing, it is my belief that reading how one person may do something will strengthen our skills as artists and help us to learn and develop our own style and techniques.
The Promise: My promise to the community through this new series of articles is that I will:
Please Remember: I may not do things the way you do them, and you may not find somethings useful or you may not agree with a technique I choose to use or feature/discuss. My advice is to please note me and offer your suggestions. I am going to speak from my experience and the tutorials that people have suggested in order to write these articles. I am sure there are many other ways to paint different things, so lets keep an open mind while we try to cover all the bases and learn new things!
Getting Started: First things first. What will you need? Since I mainly use Photoshop CS3 for all of my digital works these tutorials/lessons etc. will mainly concern the use of this program. We may briefly touch on other programs, or mention the use of materials such as poser models, but the main focus will be on and in Photoshop and the tutorials that will be provided will use this program. (You may be able to adapt them to other programs such as Paint Shop Pro.) You will need some basic knowledge of Photoshop and how to navigate inside the program, these basics will not be covered.
So, Sue, will I also need a tablet? It will help greatly if you have one, it will make painting much easier and you will have a lot more control than you will with a mouse. You can still participate if you do not have one, but it is highly recommended for pen pressure, sensitivity, brush settings, etc. Now is a good time to make sure you have the latest driver for your tablet by checking the manufacturers website!(Very inexpensive ones are now available at places like Best Buy.)
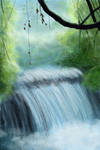
For this edition I want to first show you the results of some of the paintings that were done for the first article:
 :thumb65826520:

 :thumb66812781:
You must note me with your work from the articles if you want it featured here! Thanks!
All paintings have some sort of background. Whether its a portrait with a simple splash of color or a complex scene, its something that needs to be considered when planning and painting your image. For this article I would like to concentrate more on the background of your image. Not only will this be an exercise in backgrounds but also a bit about blending your surroundings.
First we are going to start with brushes (again!) If you were lucky enough to grab a copy of Septembers ImagineFX then you have the DVD companion disk and a great set of brushes by our very own dahlig (I am huge fan of this magazine and its quite helpful to digital artists.) Nows the time to grab those brushes off the DVD and to read the article they correspond to! I bought a copy of the magazine a few days ago and was amazed to see that some of the same stuff she was covering in the magazine tutorial I would be covering here. So, fear not, if you don't have a copy, its ok, its just an added bonus!
Below are some brushes you will find extremely useful - and I am going to cover how to use them so that you can create your very own painted backgrounds for your artworks!
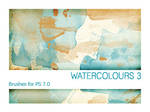
The Textures:
You will need some basic texture brushes, you should already have these from the first article, the larger ones are useful for laying down the foundation of color on your blank canvas. For this tutorial I am painting a few quick basic trees and grass, but you can choose to paint whatever you want. In case you missed the article here are some of the basic texture brushes from that article, plus a few additional ones I have recently found:


 :thumb39729069::thumb10391283:
You can do some of your own searching by browsing the following category, Resources > Application Resources > Photoshop Brushes Don't forget you can check the end of each article for links to previous articles!</sup>
Once you find a brush you like, don't forget about brush settings which were covered in Edition 1, using a large texture brush with settings set to the following works really great for laying down the basic colors:
Start Painting:
Open a new canvas, and fill it with a basic color for your background, use your brush to lay down the other basic colors on a new layer. You must also keep your lighting in mind, although you can alter it as you go along, having a general idea of which direction your light is coming from is going to help greatly. In my tree painting I am using one texture brush, I have filled the new canvas with a dark green, and I have used the brush over the top of it on a new layer starting with a darker green for the bottom and gradually getting lighter towards the top where the sun would be coming through the trees in the back.

If you used a very rough texture brush now is a good time to slightly blur the textured layer to give it a more faded/softer feel. This is only the basic layer, it doesn't have to be perfect. I have actually gone back and tweaked my color scheme by clicking the texture layer and going to Image > Adjustment > Color Balance, my finished image looks nothing like what I started with!
Trees:
Make a new layer above this one. In my case, I am painting trees in a small outcropping probably near a field of some sort. I choose a color brown that matches the greens/greys I have already painted in, remember, nearly everything will reflect light and the colors around it, even if its only very slight! I paint in one main tree to the side, this one will have a lot more details in the end. The trees in the back I paint with a slightly more greenish - brown color to match and fade in with the background better. Now I have a very basic forest, but its not good enough, there are a few other elements I normally add before adding my figures, though the background is worked on through out the entire painting process, I now need to clean up my trees and put in some grass. While cleaning up my trees I have decided to go back and completely re-do them, this happens in painting quite often, don't get discouraged!
I specifically followed this fantastic tutorial on painting trees:
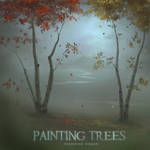 and I highly recommend checking it out as it helps a great deal in achieving realism and covers a lot of the very important things with trees.
Also other "tree" tutorials:
 :thumb59350493::thumb5158511:

Here are a few things to keep in mind with trees, plus some little tips and tricks:
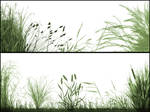
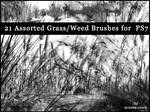
Grass:
Currently there is 4 layers to my work so far. The base layer (color filled), the textured layer and very basic colors/highlights (going from darker at the bottom to lighter at the top), and two trees, I had a lot more but I have since removed them and changed a lot of things. I'm going to move on to grass and finish highlights/shadows on the trees later.
Theres a great shortcut you can use for creating grass in the background and that is by using brushes (of course!) The key to remember here is that the magic is all in the brush settings, and how you apply the brushes. Try downloading and experimenting with some of the below grass brushes:
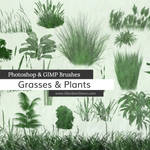
Just a sampling of whats out there!
Here are a few things to keep in mind with grass, plus some little tips and tricks:
The final thought to remember when painting grass is this: Even though you have used a few grass brushes, you must still go back with a very small round brush (pen pressure or fade selected) and paint in individual strands of grass! Make sure to blend in the brushed on grass with your hand painted strands to make the entire thing come together. Grass with the proper highlights and shadows is going to go a long way in making everything go together well.
The Details:
Once I have in my basic trees, grass, etc. I go back over everything and put in more highlights and shadows. I tend not to stay in one place too long but work more all over, I get bored of one thing, and move on and come back to it later. Below are some very useful brush sets you can use for small details. Remember, they are not simply meant to be stamped and thats it, you must go back over them and paint in details, highlights, and shadows, but they are a great quick trick to use in pinch as a guide to work from!
Tree Bark:


These brushes are great, after you paint your trees make a new layer above them. Choose a brush and stamp it on the tree trunk, you are going to have to keep rotating the brush to making it look best. You will also need to set your layer style to overlay, or soft light. Experiment with color and opacity to get the look you are going for.
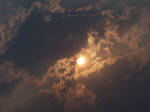
Clouds:
 :thumb54053680:

A few great tutorials I found while compiling resources for the articles. Clouds are a lot of fun to paint, and can be one of the easier things to paint for your scene/background. Its one of the only areas you might be able to get away with using a soft brush!
Rocks:
 :thumb10229563::thumb21914158:
These are used the same way as the tree bark brushes, they are meant to help you texture your paintings for a more realistic look and feel. You should set the layer styles to overlay, soft light, or something similar to get a decent outcome. Remember to experiment with color!
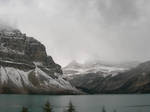
The Assignment:
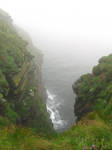
So, with all this info on nature backgrounds, its probably about time you all got painting your own! I'm including a few stock photos to use as reference only! Some things I didn't cover, some I did, but basic shadow/highlight technique and blending can be applied to pretty much almost anything. In future articles we will cover lighting and so forth, one step at a time! Make sure to link back to the refs you use, and upload to scraps if your work is a practice work or if it is unfinished, WIP!


 :thumb66157956::thumb30952557:
 :thumb52676619:
Please note me with your finished image(s) so that I may link them in the next article!
A Final Reminder:
Remember brushes are great for a base, and to cut small corners in your work and make it a little easier but they should be used in moderation and should be blended and painted to properly fit in.
Miss Edition 1? Catch up here: Learning to Paint Digitally, Edition 1
The Plan: This series is not only to give beginners a starting point, but also to help even seasoned painters with tricks or tips they did not know before. My hope is that we all learn something we did not know before since there are so many ways to do one thing, it is my belief that reading how one person may do something will strengthen our skills as artists and help us to learn and develop our own style and techniques.
The Promise: My promise to the community through this new series of articles is that I will:
- Read each Tutorial before presenting it to you.
- Try each brush set myself before including it in the "lessons."
- Try to be as clear and simple as possible.
- I will continue to take your suggestions for tutorials, brushes, and resources.
Please Remember: I may not do things the way you do them, and you may not find somethings useful or you may not agree with a technique I choose to use or feature/discuss. My advice is to please note me and offer your suggestions. I am going to speak from my experience and the tutorials that people have suggested in order to write these articles. I am sure there are many other ways to paint different things, so lets keep an open mind while we try to cover all the bases and learn new things!
Getting Started: First things first. What will you need? Since I mainly use Photoshop CS3 for all of my digital works these tutorials/lessons etc. will mainly concern the use of this program. We may briefly touch on other programs, or mention the use of materials such as poser models, but the main focus will be on and in Photoshop and the tutorials that will be provided will use this program. (You may be able to adapt them to other programs such as Paint Shop Pro.) You will need some basic knowledge of Photoshop and how to navigate inside the program, these basics will not be covered.
So, Sue, will I also need a tablet? It will help greatly if you have one, it will make painting much easier and you will have a lot more control than you will with a mouse. You can still participate if you do not have one, but it is highly recommended for pen pressure, sensitivity, brush settings, etc. Now is a good time to make sure you have the latest driver for your tablet by checking the manufacturers website!(Very inexpensive ones are now available at places like Best Buy.)
For this edition I want to first show you the results of some of the paintings that were done for the first article:
:thumb65826520:
:thumb66812781:You must note me with your work from the articles if you want it featured here! Thanks!
All paintings have some sort of background. Whether its a portrait with a simple splash of color or a complex scene, its something that needs to be considered when planning and painting your image. For this article I would like to concentrate more on the background of your image. Not only will this be an exercise in backgrounds but also a bit about blending your surroundings.
First we are going to start with brushes (again!) If you were lucky enough to grab a copy of Septembers ImagineFX then you have the DVD companion disk and a great set of brushes by our very own dahlig (I am huge fan of this magazine and its quite helpful to digital artists.) Nows the time to grab those brushes off the DVD and to read the article they correspond to! I bought a copy of the magazine a few days ago and was amazed to see that some of the same stuff she was covering in the magazine tutorial I would be covering here. So, fear not, if you don't have a copy, its ok, its just an added bonus!
Below are some brushes you will find extremely useful - and I am going to cover how to use them so that you can create your very own painted backgrounds for your artworks!
The Textures:
You will need some basic texture brushes, you should already have these from the first article, the larger ones are useful for laying down the foundation of color on your blank canvas. For this tutorial I am painting a few quick basic trees and grass, but you can choose to paint whatever you want. In case you missed the article here are some of the basic texture brushes from that article, plus a few additional ones I have recently found:
:thumb39729069::thumb10391283:
You can do some of your own searching by browsing the following category, Resources > Application Resources > Photoshop Brushes Don't forget you can check the end of each article for links to previous articles!</sup>
Once you find a brush you like, don't forget about brush settings which were covered in Edition 1, using a large texture brush with settings set to the following works really great for laying down the basic colors:
- Check box for Shape Dynamics > and then Pen Pressure on (there are also two check boxes at the bottom of this tab for flip X & Y Jitter, these are useful if checked as well)
- Check box for Scatter > and both axes on
- Check box for Other Dynamics > Pen Pressure on
Start Painting:
Open a new canvas, and fill it with a basic color for your background, use your brush to lay down the other basic colors on a new layer. You must also keep your lighting in mind, although you can alter it as you go along, having a general idea of which direction your light is coming from is going to help greatly. In my tree painting I am using one texture brush, I have filled the new canvas with a dark green, and I have used the brush over the top of it on a new layer starting with a darker green for the bottom and gradually getting lighter towards the top where the sun would be coming through the trees in the back.
If you used a very rough texture brush now is a good time to slightly blur the textured layer to give it a more faded/softer feel. This is only the basic layer, it doesn't have to be perfect. I have actually gone back and tweaked my color scheme by clicking the texture layer and going to Image > Adjustment > Color Balance, my finished image looks nothing like what I started with!
Trees:
Make a new layer above this one. In my case, I am painting trees in a small outcropping probably near a field of some sort. I choose a color brown that matches the greens/greys I have already painted in, remember, nearly everything will reflect light and the colors around it, even if its only very slight! I paint in one main tree to the side, this one will have a lot more details in the end. The trees in the back I paint with a slightly more greenish - brown color to match and fade in with the background better. Now I have a very basic forest, but its not good enough, there are a few other elements I normally add before adding my figures, though the background is worked on through out the entire painting process, I now need to clean up my trees and put in some grass. While cleaning up my trees I have decided to go back and completely re-do them, this happens in painting quite often, don't get discouraged!
I specifically followed this fantastic tutorial on painting trees:
and I highly recommend checking it out as it helps a great deal in achieving realism and covers a lot of the very important things with trees.Also other "tree" tutorials:
:thumb59350493::thumb5158511:
Here are a few things to keep in mind with trees, plus some little tips and tricks:
- Trees seldom go straight up and down, they curve and have very irregular shapes
- Trees are never smooth! They have knots and bark
- For a large forest you can sometimes get away with duplicating trees and flipping them, though try to make them different or blend them in so its not noticeable
- There are many different types of trees and roots, be sure to check stock photos for ideas and references
Grass:
Currently there is 4 layers to my work so far. The base layer (color filled), the textured layer and very basic colors/highlights (going from darker at the bottom to lighter at the top), and two trees, I had a lot more but I have since removed them and changed a lot of things. I'm going to move on to grass and finish highlights/shadows on the trees later.
Theres a great shortcut you can use for creating grass in the background and that is by using brushes (of course!) The key to remember here is that the magic is all in the brush settings, and how you apply the brushes. Try downloading and experimenting with some of the below grass brushes:
Just a sampling of whats out there!
Here are a few things to keep in mind with grass, plus some little tips and tricks:
- As you go deeper, and further back into the image, the grass will be smaller, and fade into the background.
- Not all grass is the same color, stamp and paint the grass brushes on with several different hues or greens, browns, yellows, etc.
- Grass can be highly reflective and there are going to be spots that are darker and lighter than other spots, it should never look "flat."
- When you are happy with the grass try duplicating the layer, and flipping it horizontally, it helps to fill in areas
- Try applying a very light gaussian blur to the grass at about .4%
- Adding grass to the very front is a nice effect
- Erase bits of grass you don't need, also this will help to blend in rough edges
- Create areas of sunlight or small highlighted areas using the dodge tool, the burn tool is good for blending the bottom grass and making it appear darker
The final thought to remember when painting grass is this: Even though you have used a few grass brushes, you must still go back with a very small round brush (pen pressure or fade selected) and paint in individual strands of grass! Make sure to blend in the brushed on grass with your hand painted strands to make the entire thing come together. Grass with the proper highlights and shadows is going to go a long way in making everything go together well.
The Details:
Once I have in my basic trees, grass, etc. I go back over everything and put in more highlights and shadows. I tend not to stay in one place too long but work more all over, I get bored of one thing, and move on and come back to it later. Below are some very useful brush sets you can use for small details. Remember, they are not simply meant to be stamped and thats it, you must go back over them and paint in details, highlights, and shadows, but they are a great quick trick to use in pinch as a guide to work from!
Tree Bark:
These brushes are great, after you paint your trees make a new layer above them. Choose a brush and stamp it on the tree trunk, you are going to have to keep rotating the brush to making it look best. You will also need to set your layer style to overlay, or soft light. Experiment with color and opacity to get the look you are going for.
Clouds:
:thumb54053680:
A few great tutorials I found while compiling resources for the articles. Clouds are a lot of fun to paint, and can be one of the easier things to paint for your scene/background. Its one of the only areas you might be able to get away with using a soft brush!
Rocks:
:thumb10229563::thumb21914158:These are used the same way as the tree bark brushes, they are meant to help you texture your paintings for a more realistic look and feel. You should set the layer styles to overlay, soft light, or something similar to get a decent outcome. Remember to experiment with color!
The Assignment:
So, with all this info on nature backgrounds, its probably about time you all got painting your own! I'm including a few stock photos to use as reference only! Some things I didn't cover, some I did, but basic shadow/highlight technique and blending can be applied to pretty much almost anything. In future articles we will cover lighting and so forth, one step at a time! Make sure to link back to the refs you use, and upload to scraps if your work is a practice work or if it is unfinished, WIP!
:thumb66157956::thumb30952557:
:thumb52676619:Please note me with your finished image(s) so that I may link them in the next article!
A Final Reminder:
Remember brushes are great for a base, and to cut small corners in your work and make it a little easier but they should be used in moderation and should be blended and painted to properly fit in.
Miss Edition 1? Catch up here: Learning to Paint Digitally, Edition 1
New Products at Renderosity
Always NEW items being added 1-3 times a week at my Renderosity Shop
I sell loads of products/content both 3D & 2D to help artists create the visions of their minds, maybe you need the perfect background/setting, maybe the perfect outfit or add on for your clothes? Vendors can find something too with my large assortment of merchant resources, patterns, elements, and more!
Looking to learn? Check out one of my many tutorials on Poser, Photoshop, and a combination of the two! Learn my blending techniques, hair painting, stitching, tips and tricks, the list goes on!
Life gets in the way...
New commissions are now closed.
I've actually been turning them down for over a year now, but I haven't actually announced it, its a hard decision to make as an artist to tell your customers "nope can't do it."
So this decision does not come lightly. However, with my 3 kids, (7 months, 6 yrs (autistic), and 16) I just do not have the time between the kids and my business. I am a mom/wife first, a vendor at Renderosity 2nd, and so a freelancing commissioned artist just doesn't seem to fit anymore.
This does not affect licensing!
If you are interested in licensing a work of art I have already created for a project of your own such as a co
Valentine's Day is coming!
...and I so have what you need!
My store is on sale 25% off this weekend!
Valentine's Day is coming up! I just want to remind everyone of the resources I have that are in my shop full of love, hearts, and gothy goodness!
I love this set, its done very well in my shop, its a bit older, came out in 2010! At the time it was very original, I see its being done to death now! (lol)
:thumb153469934:
Here we have some pin-up and grungy styles:
:thumb196012289::thumb196013387::thumb180726782:
Need a bit more romance and flowers?
:thumb196400970::thumb207941310::thumb265725552::thumb168719301::thumb157555294::thumb152808547::thumb152808133::t
Happy Holidays, Big Sale, New Work!
BIG SALE!
ALL of my backgrounds, stocks, brushes, characters, hair textures, resources, EVERYTHING is ON SALE until January 30% OFF! Now is the time to stock up for your art!
Check out the store: http://www.renderosity.com/mod/bcs/index.php?vendor=210915
New Products:
:thumb274364075: :thumb274364249: :thumb273086691: :thumb272955958: :thumb270854083: :thumb272477411:
Tutorials:
Here are the current tutorials I have for sale:
:thumb272477411: :thumb264233825: :thumb202261844: :thumb255132913: :thumb216781211: :thumb205110749:
Happy Holidays!
To everyone who celebrates any of the holidays this time of year, may you and your loved o
© 2007 - 2024 cosmosue
Comments80
Join the community to add your comment. Already a deviant? Log In
I love painting but could be better - thanks for such a great thing!!!