ShopDreamUp AI ArtDreamUp
Deviation Actions

Welcome to the new news article series, Learning to Paint Digitally. Since even before I joined the AR Team I have been receiving notes, emails, etc. from fellow deviants asking me how to get started with digital painting and/or mixed media. So, along with my knowledge, and the help of tutorials and resources I hope to bring something truly valuable to those wishing to learn more about painting digitally within Photoshop.
I can't say how many articles will be included in this series, only that each one will be unique and should you wish to participate even more, and take it one step further there will be practice materials suggested at the end of the article, ideally I would love to see the results uploaded so that I can display them and we can see how people are improving and coming along with the help of these "lessons."
The Plan: This series is not only to give beginners a starting point, but also to help even seasoned painters with tricks or tips they did not know before. My hope is that we all learn something we did not know before since there are so many ways to do one thing, it is my belief that reading how one person may do something will strengthen our skills as artists and help us to learn and develop our own style and techniques.
The Promise: My promise to the community through this new series of articles is that I will:
Please Remember: I may not do things the way you do them, and you may not find somethings useful or you may not agree with a technique I choose to use or feature/discuss. My advice is to please note me and offer your suggestions. I am going to speak from my experience and the tutorials that people have suggested in order to write these articles. I am sure there are many other ways to paint different things, so lets keep an open mind while we try to cover all the bases and learn new things!
Getting Started: First things first. What will you need? Since I mainly use Photoshop CS3 for all of my digital works these tutorials/lessons etc. will mainly concern the use of this program. We may briefly touch on other programs, or mention the use of materials such as poser models, but the main focus will be on and in Photoshop and the tutorials that will be provided will use this program. (You may be able to adapt them to other programs such as Paint Shop Pro.) You will need some basic knowledge of Photoshop and how to navigate inside the program, these basics will not be covered.
So, Sue, will I also need a tablet? It will help greatly if you have one, it will make painting much easier and you will have a lot more control than you will with a mouse. You can still participate if you do not have one, but it is highly recommended for pen pressure, sensitivity, brush settings, etc. Now is a good time to make sure you have the latest driver for your tablet by checking the manufacturers website!(Very inexpensive ones are now available at places like Best Buy.)
So what are we waiting for? Lets grab some brushes and get to the painting right? Right. In my opinion, the only way you will truly learn, improve, and refine your skills and own style is to get in there and get dirty! (digitally of course!)
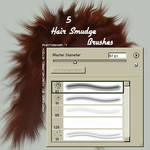
Brushes: You will need some basic painting brushes. You may choose to use the basic hard round brush to do all of your work, (many use this method) or you may choose to use brushes and brush effects that will give you different textures and results. You can choose to also simply use the default set of brushes in Photoshop, as this will serve all your needs - the extra brushes are just that - something extra, some consider them to be quite useful, some don't. The basic set of brushes is the set you get when you right click your canvas, click the arrow, and then choose Reset Brushes. These basic default brushes can be "tweaked" by altering the settings making them much more useful!
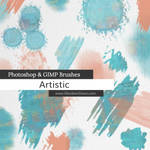
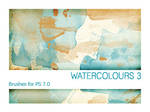
For simplicity purposes we are going to use the default Photoshop Brushes for this article. But if you have some you would rather use, or you plan to download some go right ahead, you can do some of your own searching by browsing the following category, Resources > Application Resources > Photoshop Brushes, browse.deviantart.com/resource…)</sup></b> Look for brushes that mimic the traditional mediums like oils, acrylics, etc. and brushes that are used for paint strokes instead of stamping. Brushes made with little dots are great for texture.
Some brushes to try:


 :thumb39729069::thumb10391283:
*please note, if you choose to download brushes and use them make sure you credit the brush makers. Also, in order to get the desired results you will most likely have to alter brush settings within Photoshop, see below*
We are going to start small for practice reasons, so make a new canvas roughly 800x800, Resolution 300. Since this is only for practice it would be really good to divide this canvas in half and fill one side with a dark color and one side with a light color, don't worry about being perfect about it! Load up your default Photoshop brush set (or some downloaded ones if you have them) and pick a brush, it really doesn't matter which at this time but you should experiment with several by practicing in both light and dark colors, try the brush on its default setting and then open the brush options. Draw little doodles, circles, and try some shading - really basic at this point. You just want to get a good idea and a feel for how the brushes work. Below is a quick practice I did using some of the default Photoshop brushes and some of the ones from this article.

If you haven't already you may want to now open the brush options. Once in the brush options you want to check the following things, and then experiment again, remember just because a brush set says "for hair" doesn't mean its only for hair, look outside the name of the brush! See below:
Try all of these settings out both together and separate and observe the effects you get when painting both with pen pressure, with fade, and without. Color dynamics are also great to use with scatter. The most basic small texture brush can become your most loved simply by changing the dynamics of the brush and the pressure. Feel confident yet? You should definitely be feeling a bit more comfortable with both brushes and Photoshop. Its time to try some real painting!
Before we go further, I think we should all see where we are at, that way when these articles are finished you can compare your first work with the one you would complete at the end of this series of articles. (Obviously you may also do lots of other painting between the release of future articles but that will just help in the long run.)
We are going to take a basic stock photo and try to recreate it either in whole or part, but it MUST be your own work using the stock photo as ONLY a reference. You should start with a blank canvas in Photoshop, for these practice works I would start at no larger than 6000 pixels any which way but no smaller than 900x900, at 300 Resolution. You can choose to do just part of the stock photo, and/or you can choose to add your own touches of course! But the stock must be referenced for comparison at the end of these articles. There should be no over painting in this exercise.
Everyone has 2 weeks to complete, when you are finished it would be great if you could note me the thumb so that I can feature them all! This doesn't have to be a speed painting, it can be as detailed as you want, but remember, if its an unfinished practice work it should be uploaded into Scraps.</i>
Please choose one of the below stock photos! You may choose to do one or more paintings but you must use the stock for comparison reasons. I have chosen several for a good variety.
:thumb64583802::thumb64460483::thumb63328856: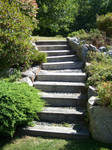 :thumb64336633::thumb34769678::thumb37058668::thumb64528022:

Make sure to credit the stock artist when using their photos even for references!
Please note me when you finish with a link to your work. I tried to choose photos for all skill levels, if one isn't working for you, try another. I'll be participating as well! If you wish to discuss your finished work with me, or ask for critiques please don't hesitate, this is a learning experience for many people including myself, there is always something to learn!
Stay tuned for the next installment of Learning to Paint Digitally!
I can't say how many articles will be included in this series, only that each one will be unique and should you wish to participate even more, and take it one step further there will be practice materials suggested at the end of the article, ideally I would love to see the results uploaded so that I can display them and we can see how people are improving and coming along with the help of these "lessons."
The Plan: This series is not only to give beginners a starting point, but also to help even seasoned painters with tricks or tips they did not know before. My hope is that we all learn something we did not know before since there are so many ways to do one thing, it is my belief that reading how one person may do something will strengthen our skills as artists and help us to learn and develop our own style and techniques.
The Promise: My promise to the community through this new series of articles is that I will:
- Read each Tutorial before presenting it to you.
- Try each brush set myself before including it in the "lessons."
- Try to be as clear and simple as possible.
- I will continue to take your suggestions for tutorials, brushes, and resources.
Please Remember: I may not do things the way you do them, and you may not find somethings useful or you may not agree with a technique I choose to use or feature/discuss. My advice is to please note me and offer your suggestions. I am going to speak from my experience and the tutorials that people have suggested in order to write these articles. I am sure there are many other ways to paint different things, so lets keep an open mind while we try to cover all the bases and learn new things!
Getting Started: First things first. What will you need? Since I mainly use Photoshop CS3 for all of my digital works these tutorials/lessons etc. will mainly concern the use of this program. We may briefly touch on other programs, or mention the use of materials such as poser models, but the main focus will be on and in Photoshop and the tutorials that will be provided will use this program. (You may be able to adapt them to other programs such as Paint Shop Pro.) You will need some basic knowledge of Photoshop and how to navigate inside the program, these basics will not be covered.
So, Sue, will I also need a tablet? It will help greatly if you have one, it will make painting much easier and you will have a lot more control than you will with a mouse. You can still participate if you do not have one, but it is highly recommended for pen pressure, sensitivity, brush settings, etc. Now is a good time to make sure you have the latest driver for your tablet by checking the manufacturers website!(Very inexpensive ones are now available at places like Best Buy.)
So what are we waiting for? Lets grab some brushes and get to the painting right? Right. In my opinion, the only way you will truly learn, improve, and refine your skills and own style is to get in there and get dirty! (digitally of course!)
Brushes: You will need some basic painting brushes. You may choose to use the basic hard round brush to do all of your work, (many use this method) or you may choose to use brushes and brush effects that will give you different textures and results. You can choose to also simply use the default set of brushes in Photoshop, as this will serve all your needs - the extra brushes are just that - something extra, some consider them to be quite useful, some don't. The basic set of brushes is the set you get when you right click your canvas, click the arrow, and then choose Reset Brushes. These basic default brushes can be "tweaked" by altering the settings making them much more useful!
For simplicity purposes we are going to use the default Photoshop Brushes for this article. But if you have some you would rather use, or you plan to download some go right ahead, you can do some of your own searching by browsing the following category, Resources > Application Resources > Photoshop Brushes, browse.deviantart.com/resource…)</sup></b> Look for brushes that mimic the traditional mediums like oils, acrylics, etc. and brushes that are used for paint strokes instead of stamping. Brushes made with little dots are great for texture.
Some brushes to try:
:thumb39729069::thumb10391283:*please note, if you choose to download brushes and use them make sure you credit the brush makers. Also, in order to get the desired results you will most likely have to alter brush settings within Photoshop, see below*
We are going to start small for practice reasons, so make a new canvas roughly 800x800, Resolution 300. Since this is only for practice it would be really good to divide this canvas in half and fill one side with a dark color and one side with a light color, don't worry about being perfect about it! Load up your default Photoshop brush set (or some downloaded ones if you have them) and pick a brush, it really doesn't matter which at this time but you should experiment with several by practicing in both light and dark colors, try the brush on its default setting and then open the brush options. Draw little doodles, circles, and try some shading - really basic at this point. You just want to get a good idea and a feel for how the brushes work. Below is a quick practice I did using some of the default Photoshop brushes and some of the ones from this article.
If you haven't already you may want to now open the brush options. Once in the brush options you want to check the following things, and then experiment again, remember just because a brush set says "for hair" doesn't mean its only for hair, look outside the name of the brush! See below:
- Shape Dynamics - check this box and try both pen pressure and fade options, these are VERY useful!
- Scattering - this is great for texturing skin, backgrounds, etc. try it with a spackled or speckled brush and you will see the great effects you get!
- Other Dynamics - check this box and you will see the change will alter the opacity according to the pressure of your pen.
- Color Dynamics - great for altering the color while you paint, for example, it works well on scales and backgrounds!
Try all of these settings out both together and separate and observe the effects you get when painting both with pen pressure, with fade, and without. Color dynamics are also great to use with scatter. The most basic small texture brush can become your most loved simply by changing the dynamics of the brush and the pressure. Feel confident yet? You should definitely be feeling a bit more comfortable with both brushes and Photoshop. Its time to try some real painting!
Before we go further, I think we should all see where we are at, that way when these articles are finished you can compare your first work with the one you would complete at the end of this series of articles. (Obviously you may also do lots of other painting between the release of future articles but that will just help in the long run.)
We are going to take a basic stock photo and try to recreate it either in whole or part, but it MUST be your own work using the stock photo as ONLY a reference. You should start with a blank canvas in Photoshop, for these practice works I would start at no larger than 6000 pixels any which way but no smaller than 900x900, at 300 Resolution. You can choose to do just part of the stock photo, and/or you can choose to add your own touches of course! But the stock must be referenced for comparison at the end of these articles. There should be no over painting in this exercise.
Everyone has 2 weeks to complete, when you are finished it would be great if you could note me the thumb so that I can feature them all! This doesn't have to be a speed painting, it can be as detailed as you want, but remember, if its an unfinished practice work it should be uploaded into Scraps.</i>
Please choose one of the below stock photos! You may choose to do one or more paintings but you must use the stock for comparison reasons. I have chosen several for a good variety.
:thumb64583802::thumb64460483::thumb63328856:
:thumb64336633::thumb34769678::thumb37058668::thumb64528022:
Make sure to credit the stock artist when using their photos even for references!
Please note me when you finish with a link to your work. I tried to choose photos for all skill levels, if one isn't working for you, try another. I'll be participating as well! If you wish to discuss your finished work with me, or ask for critiques please don't hesitate, this is a learning experience for many people including myself, there is always something to learn!
Stay tuned for the next installment of Learning to Paint Digitally!
New Products at Renderosity
Always NEW items being added 1-3 times a week at my Renderosity Shop
I sell loads of products/content both 3D & 2D to help artists create the visions of their minds, maybe you need the perfect background/setting, maybe the perfect outfit or add on for your clothes? Vendors can find something too with my large assortment of merchant resources, patterns, elements, and more!
Looking to learn? Check out one of my many tutorials on Poser, Photoshop, and a combination of the two! Learn my blending techniques, hair painting, stitching, tips and tricks, the list goes on!
Life gets in the way...
New commissions are now closed.
I've actually been turning them down for over a year now, but I haven't actually announced it, its a hard decision to make as an artist to tell your customers "nope can't do it."
So this decision does not come lightly. However, with my 3 kids, (7 months, 6 yrs (autistic), and 16) I just do not have the time between the kids and my business. I am a mom/wife first, a vendor at Renderosity 2nd, and so a freelancing commissioned artist just doesn't seem to fit anymore.
This does not affect licensing!
If you are interested in licensing a work of art I have already created for a project of your own such as a co
Valentine's Day is coming!
...and I so have what you need!
My store is on sale 25% off this weekend!
Valentine's Day is coming up! I just want to remind everyone of the resources I have that are in my shop full of love, hearts, and gothy goodness!
I love this set, its done very well in my shop, its a bit older, came out in 2010! At the time it was very original, I see its being done to death now! (lol)
:thumb153469934:
Here we have some pin-up and grungy styles:
:thumb196012289::thumb196013387::thumb180726782:
Need a bit more romance and flowers?
:thumb196400970::thumb207941310::thumb265725552::thumb168719301::thumb157555294::thumb152808547::thumb152808133::t
Happy Holidays, Big Sale, New Work!
BIG SALE!
ALL of my backgrounds, stocks, brushes, characters, hair textures, resources, EVERYTHING is ON SALE until January 30% OFF! Now is the time to stock up for your art!
Check out the store: http://www.renderosity.com/mod/bcs/index.php?vendor=210915
New Products:
:thumb274364075: :thumb274364249: :thumb273086691: :thumb272955958: :thumb270854083: :thumb272477411:
Tutorials:
Here are the current tutorials I have for sale:
:thumb272477411: :thumb264233825: :thumb202261844: :thumb255132913: :thumb216781211: :thumb205110749:
Happy Holidays!
To everyone who celebrates any of the holidays this time of year, may you and your loved o
© 2007 - 2024 cosmosue
Comments146
Join the community to add your comment. Already a deviant? Log In
I've been searching for ages to a basic guide to painting digitally and this is great, thank you for making it! 